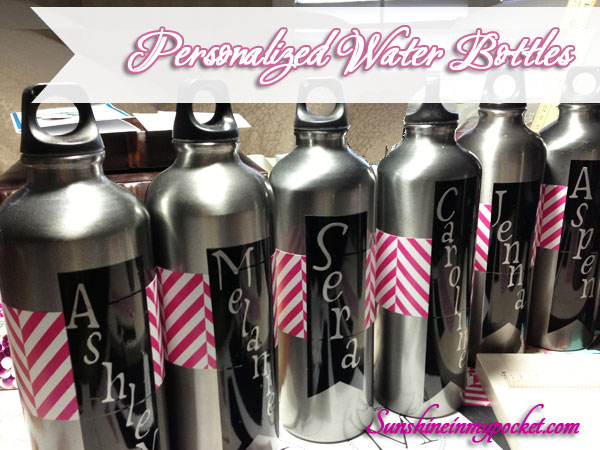
Here’s another goodie I designed and created for Girls Camp! The first thing I think about for camping is WATER. And I was in search of the perfect water bottle to give to the girls. (The camp director wanted their NAMES on the bottles…and you can bet I took on the challenge.)
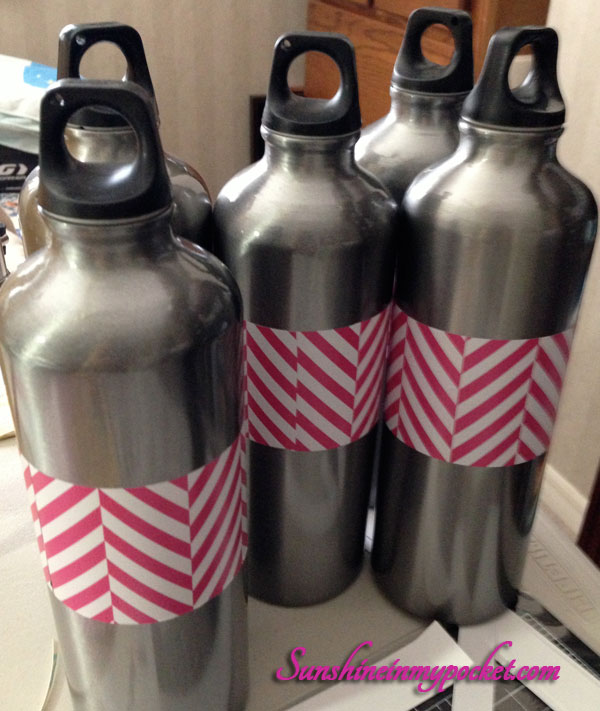
It was fortunate for me that I found these metallic water bottles at the Dollar Store! I had to visit 6 dollar stores in order to find enough of them! Each store had a few, or none…and since I am not the type to give up, I just kept on going to more stores until I found matching bottles. (I was happy to finally find victory!)
Since our colors were grey, pink and chevron, I thought the metallic work work out perfectly. And then I found the pink herringbone vinyl (which is sort of like chevron, right?) and I just knew it was a great match.
To make these personalized water bottles, first adhere the pink herringbone vinyl.
Second, trim the black shiny vinyl (I cut it into 1 1/2″ strips)
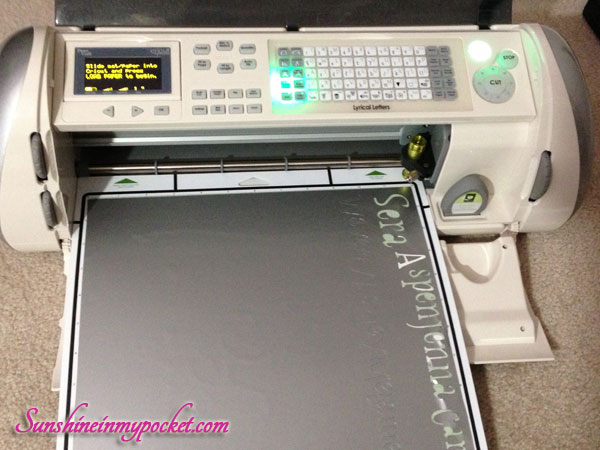
Third, cut the silver metallic vinyl letters with a die cut machine. (I used my Cricut and the Lyrical Letters font)
Adhere the metallic letters to the black vinyl strips. And cut them down into flags after you put on the letters.
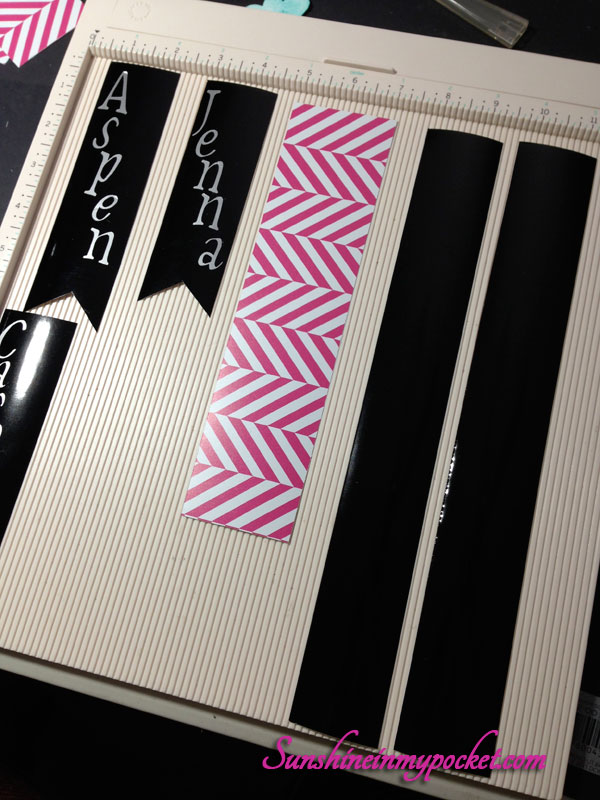
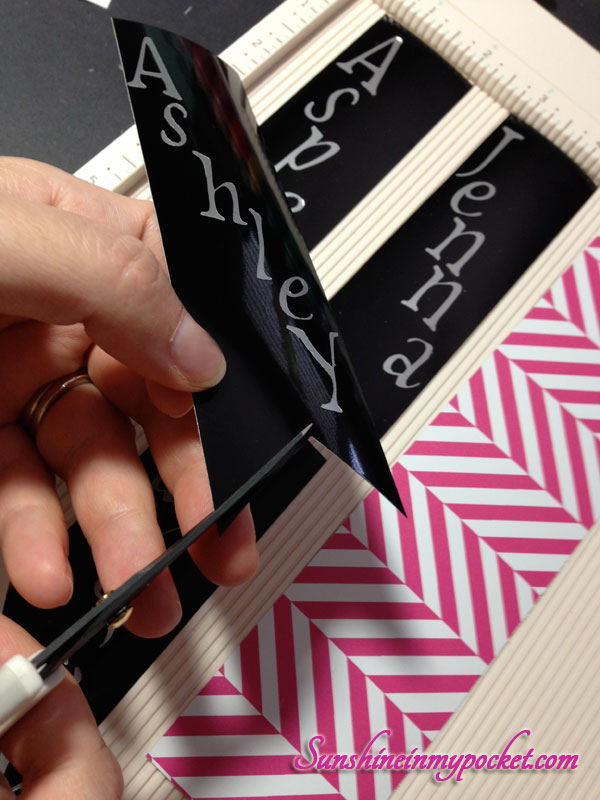
Here’s a tip for cutting the perfect flag end: Cut the middle of the flag first, up about an inch. Then, cut from the bottom left side up to the cut mark in the middle…and then cut from the bottom right side up to the cut mark in the middle. Voila! A perfect flag every time.
Last, adhere the flag with letters to the water bottles with the pink herringbone already attached.
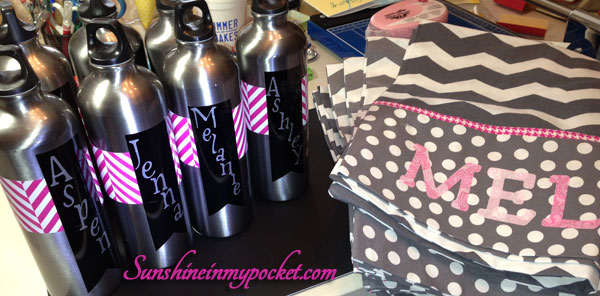
I think they turned out pretty cute, don’t you? (And there’s a sneak peek at the pillowcases I made…coming in another post!)
Bonus: here’s a sweet little (easy) gift sack I put together for a treat:
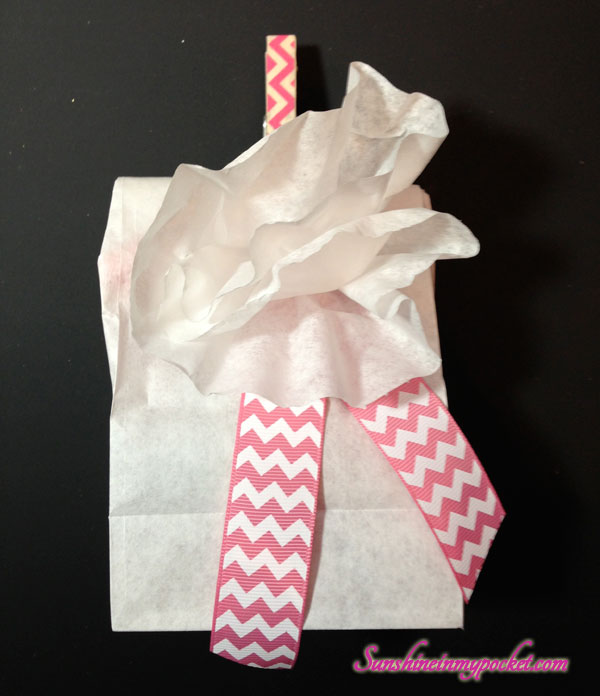
It’s just a white lunch sack (small size) with chevron ribbon, white coffee filter flower, and clothes pin with washi tape! Sometimes you need a sweet little gift that takes just minutes to put together. 😉 {Inside are the best animal cracker snack bags.}
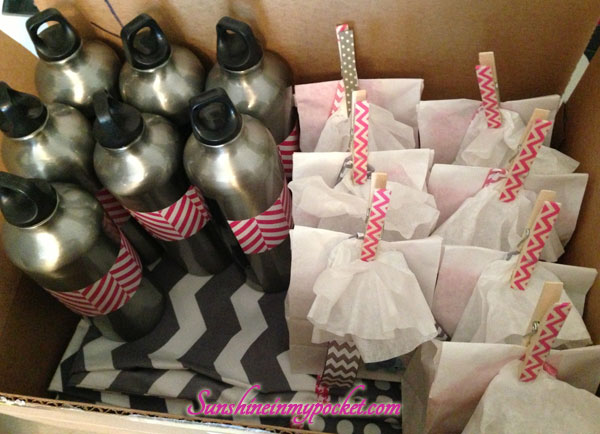
And here’s the start of getting things all boxed up. I hope they like them! And here’s what I love: acting as camp support (ie: making all these little gifts and helps) without actually GOING to camp. (In fact, I will be in California the whole time they are at camp).
But I do love still being a small part of the celebration. Happy day!
Now I hope you are not tired of pink and girly YET, I have another camp post coming soon!
May your days be filled with sunshine,